Pic Credit: Pexels
You usually notice the problems in your house when you are already late for something. The hallway suddenly feels too narrow when two people pass each other carrying laundry. Cabinets start looking smaller after another grocery run. Even simple things, like weak lighting over a counter, become irritating once you are dealing with them every single day. Most homeowners live with these annoyances longer than they should, mostly because people get used to adapting around them.
In Cincinnati, many homes were built with solid craftsmanship but older layouts that no longer match how people live now. Families are working from home more often, children are spending more time indoors, and homeowners are trying to fit modern routines into spaces designed decades ago. Renovation projects have become less about showing off style and more about fixing everyday friction inside the home. That shift has changed how people approach upgrades, especially when they start paying attention to long-term comfort instead of quick visual impact.
Hiring Professionals for Functional Renovations
Most homeowners do not start renovation planning because they suddenly want luxury finishes. Usually, it begins with practical frustration that keeps repeating itself. Kitchens feel crowded during busy mornings. Bathrooms lack storage. Older layouts force people into awkward routines that slowly wear on them over time. Renovation priorities have changed because daily life has changed, too. People are paying closer attention to functionality, lighting, movement through rooms, and how spaces actually perform under pressure. A house that looks polished but feels difficult to live in does not hold much appeal anymore, especially for families trying to balance work, schedules, and everything else happening during a normal week.
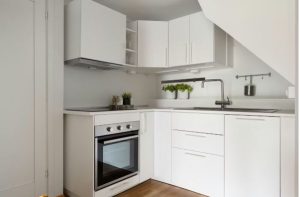
That is one reason homeowners today turn to a professional Cincinnati kitchen and bathroom remodeling contractor when planning these major renovations. Experts are often focused less on flashy trends and more on practical experience. People want contractors who understand how older homes function, how families actually use their spaces, and where renovation decisions can quietly improve daily routines without making the house feel overdesigned. The conversation has shifted toward usability, comfort, and realistic long-term value rather than dramatic transformations.
Function Is Quietly Replacing Perfection
Not long ago, people renovated homes like they were building photo sets. Huge islands, floating shelves, bright white everything. It looked clean online, sure, but living with it every day was another story. Open shelves collected dust fast. Fancy finishes scratched easily. Some spaces felt nice for guests, but awkward during an ordinary Tuesday morning when everyone was rushing around half awake.
Now homeowners seem more interested in things that quietly make life easier. Better storage. Softer lighting. Materials that can survive kids, pets, wet shoes, and takeout nights without falling apart. Homes are still being updated, just with less pressure to impress people online. Honestly, slightly imperfect spaces tend to feel more comfortable anyway.
People Want Spaces That Adapt Over Time
One noticeable change in renovation planning is how often homeowners think about the future now. Rooms are no longer expected to serve one single purpose forever. Dining rooms become work areas during the day. Guest rooms double as storage or exercise spaces. Basements are expected to handle several functions at once, which can make planning a little complicated.
This flexibility has become important because routines change faster than they used to. Remote work shifted expectations for home layouts. Families need quiet areas for meetings, schoolwork, or just escaping noise for an hour. Renovations are reflecting that reality more directly.
Storage is probably one of the biggest priorities hiding underneath all of this. People have more belongings than they did years ago, and many older homes were never designed to store everything comfortably. Built-in shelving, mudrooms, deeper cabinets, and hidden storage spaces are becoming more common because clutter affects how people feel inside their homes, even when they try to ignore it.
Some homeowners are also avoiding oversized additions altogether. Instead of adding huge amounts of square footage, they are trying to make existing spaces work harder. A smaller room with better design often feels calmer and more functional than a larger room filled with awkward, unused space.
Renovations Are Becoming More Personal
For a long time, renovation advice focused heavily on resale value. Homeowners were told to think like future buyers instead of thinking about themselves. That mindset still exists, but it has weakened quite a bit over the last few years. People are making decisions based more on how they actually live. Some homeowners want durable floors because they have pets that destroy everything in sight. Others prioritize better sound control because multiple people are working from home. Quiet dishwashers, larger showers, stronger ventilation systems, and comfortable lighting are becoming bigger priorities than dramatic statement pieces.
There is also more honesty now about what homeowners dislike maintaining. Complicated finishes and delicate materials lose appeal once people realize how much upkeep they require. Simpler surfaces that age well are becoming more attractive because homeowners are tired of constant maintenance becoming part of their routine.
Technology fits into this shift too, although in a quieter way than expected. Smart systems are still popular, but people are less interested in turning every feature into an app-controlled gadget. Most homeowners just want systems that work reliably without creating more frustration. Convenience matters. Complexity usually does not.
Comfort Has Become the Main Goal
A lot of renovation trends can be traced back to one simple idea. People want homes that feel easier to live in. Not necessarily bigger. Not necessarily expensive. Just easier. That affects almost every decision homeowners make now. Better layouts reduce stress during busy mornings. Improved lighting changes how rooms feel during the winter months. Good storage keeps clutter from spreading into every corner of the house. Even small adjustments can improve daily routines in ways people do not fully appreciate until after the work is finished.
There is also a growing understanding that comfort is not only visual. Sound levels matter. Airflow matters. Privacy matters. A renovation that quietly improves those things often has a stronger long-term effect than dramatic cosmetic upgrades.
Modern home renovations are becoming more grounded because homeowners themselves have become more grounded. People are less interested in impressing strangers and more interested in creating spaces that support real life, including the messy parts that never show up in design magazines anyway.