Browsing Category

Home & Interiors

Home & Interiors

What Are Your Sustainable Roofing Options?

Whether your existing roof has been damaged by a storm, has aged past its effectiveness, or you’re simply installing a roof on a new home, there are a lot of factors to consider in your decision. Nowadays, the eco-friendliness of that roof is a big factor for a lot of people, as well. There are a large amount of green roofing options out there, but which of them best suits your needs? Let’s look at some.

Metal Roofing

Metal roofing is one of the most sustainable options available due to its durability and energy efficiency. Metal roofs can last for 50 years or more, significantly reducing the need for replacements. They are also highly reflective, which means they can reduce cooling costs by reflecting heat away from the home. Metal roofs are often made from recycled materials and are fully recyclable at the end of their lifespan, making them an eco-friendly choice. However, the initial cost of metal roofing can be higher than other materials, and it can be noisier during rainstorms, which might be a consideration for some homeowners.

Rubber Roofing

Rubber roofing, often made from recycled tires, is another sustainable option that offers durability and flexibility. This type of roofing is resistant to extreme weather conditions, including heavy rain, snow, and high winds. Rubber roofs are also relatively low maintenance and can last up to 50 years. They provide excellent insulation, which can help reduce energy costs. However, rubber roofing can be more expensive than traditional roofing materials, and its availability might be limited depending on your location. Despite these drawbacks, rubber roofing is a good choice for those looking for a long-lasting, eco-friendly option.

Thatch Roofing

thatch roof

Pic Credit: Pexels

Thatch roofing is a traditional method that uses natural materials such as straw, reeds, or palm leaves. It’s one of the most sustainable roofing options because it uses renewable resources and has a low carbon footprint. Thatch roofs provide excellent insulation, keeping homes warm in the winter and cool in the summer. They also have a unique aesthetic appeal that blends well with natural surroundings. However, thatch roofing requires regular maintenance with the help of a thatched roof consultant to prevent leaks and is more susceptible to fire than other roofing materials. Additionally, it may not be suitable for all climates, particularly in areas with heavy rainfall or high humidity.

Green Roofing

Green roofing, also known as a living roof, involves covering a roof with vegetation. This sustainable option provides numerous environmental benefits, including improving air quality, reducing stormwater runoff, and providing insulation that lowers energy costs. Green roofs create habitats for wildlife and can extend the lifespan of the roof by protecting it from the elements. However, green roofing requires a strong structural foundation to support the weight of the soil and plants, and it can be expensive to install and maintain. Despite these challenges, green roofs are an excellent choice for environmentally conscious homeowners looking to reduce their ecological footprint.

There are even more options to research, each of them with their own pros and cons. Hopefully, this has helped you get an idea of what factors you need to consider as you look through them.

Note: This is a collaborative post 
Home & Interiors

Revamp Your Home’s Interior With These Hacks

It is important to think about some of the leading ideas that are going to help you make your home better as much as possible. This is something that you need to focus on when it comes to improving your property, and making sure your home looks great. As a homeowner, it is important

to try to make the right changes that are going to play a role in this, and it is essential to think about how this works for you.

There are so many things these days that you can do to make your home better, and help it to stand out. The best thing you can do here is to think about the best ways of revamping the interior, and the changes you can make to add some more comfort, glamour, and kerb appeal to your property. Here are some of the best things you can do:

Create an Entertainment Area

One of the key things you can do that will help you to improve your home is to create an epic entertainment area. This could be a social environment where you look to make your home stand out, and provide a chilled space to enjoy your favourite music, movies, and video games. It is essential to make sure you think about some of the leading ideas that are going to help you make this process better for you. One of the key things you can do here is buy entertainment units made in Adelaide to act as the focal point of this area, and really help make your home better in the process.  

Repaint the Place

Pic Credit: Pexels

Repainting your home is one of the best things you can do to make your property stand out and look better, and it can be done on a budget as well. Repainting the home is one simple change you can make to transform your property, and this is going to have a major impact on the home moving forward. When you are trying to make this work better for you, it is important to consider cost-effective options, and a fresh coat of paint is a great way of being able to achieve this moving forward. 

Get a Kitchen Renovation

Being able to revamp and renovate your kitchen is one of the key things you can do that is going to help you improve this, and there are so many factors that will help you here. There are so many elements that are going to help you make the right changes that play a role in this, and turning the kitchen into the heartbeat of the home is definitely going to make a big difference to this moving forward. Try to think about the kitchen renovation changes you can make, and what this means for you moving forward. 

These are just a few of the key ideas that you can use to make your home better, and these can make a huge difference to the way your property comes across. Try to do the best you can to make this work for you moving forward, and make the changes that will enhance your home, and leave it looking as excellent as possible. 

Note: This is a collaborative post 

Home & Interiors

Revamp Your Outdoor Oasis: Creative Ideas for a Stunning Patio Makeover

PiC Credit: Pexels

A patio is an extension of your home and a place where you can relax, entertain guests, or carry out both personal activities as well as social events in the comfort of outdoor living. It may work well initially, but over time it will become old or outdated and might need an update. Here are 5 easy and fun ways to get a much-needed patio makeover, but not only does this help make your outdoor space an inviting industrial-chic paradise; but it will also ensure things remain aspirational as any fellow neighbour comes sweeping through!

1) Adopt a New Design Sensibility

Redecorating the backyard When you are about to bring a new perch into your backyard, begin by choosing an overall design that fits in with just how one does life and serves as an addition to this household. Make sure you think about the general idea that you want to get across – are we going for a modern, rustic, or tropical one? This includes sprucing up your home with new furniture, decorative pillows, or rugs. 

2) Upgrade Your Patio Furniture

Improving your furniture is one of the most beneficial ways to revamp your patio. By selecting stylish and very comfortable pieces that can work outdoors. Upgrade your space with a new dining set, sectionals, and chaise lounge. 

Complete the look with accessories like outdoor cushions, throws, and a stylish coffee table. Opt for furniture with multi-functional designs, so you can effortlessly shuffle your space depending on the event—whether it be a low-key family dinner or an up-tempo soirée with friends.

3) Improve The Mood With Light

The ambiance in patio areas is created with the help of lighting. To help make it a fun and cozy nook, you should have warm lighting so stick to a mix of types Whimsical: Sting Lights or Fairy lights, Lanterns, or Sconsec use LED lights in these areas and illuminate pathways, planters, or even water features. As well, dimmable lights may be a good idea to further elevate your outdoor space with the ability to control brightness at different times of day and for events you host.

4) Add Greenery and Indoor Planters

One of the most noticeable ways that you can enhance your patio is by placing greenery on or near it. Planters and garden beds of different shapes can add color & texture. Select plants that are appropriate for the climate and outdoor space at your disposal so they do well. Instead, use the height of your garden by starting a vertical garden or plant with hanging pots to add dimension. Add herbs, flowering plants (peony/knockouts), or evergreen bushes for a lot of natural color. Putting some green plants inside your patio makes the space completely heaven on earth.

5) Account for Above-the-Fold Considerations

However, it is equally important to focus on the practical side when considering a patio makeover. Check the working order of sprinklers and water fountains. A simple solution like having pump repairs done on your fountain, if you have one and it needs service or installation, can save a lot of future hiccups keeping the environment as serene as intended when considering this patio design. Also, think about installing outdoor heating amenities or fire pits for round-the-year usage, and maybe get some outdoor blinds to keep things cool when it’s very hot, and keep insects at bay. 

In conclusion, get out there and savor your drastically modified outdoor sanctuary! A fall patio refresh is such a fun project to do and your outdoor space will be just that much more of an escape! With great weather, you’ll want to have fun friendly and families over more often or just use it as a quiet space that extends your home’s living area. 

Note: This is a collaborative post 
Home & Interiors

Run Into A Plumbing Issue? Here’s What To Do

bath tap

Pic Credit: Pexels

It doesn’t cost anything to regularly inspect your plumbing. Regular checks will reduce interior issues, leaks, and more and keep your home safe and comfortable.  Should you run into an issue with your plumbing, here are the appropriate steps.

Seek a professional inspection

When you notice something is wrong with your plumbing, the best thing you can do is seek a professional inspection. For example, you might notice a strange smell lingering in your house due to the drains. If so, you should call the experts and request a CCTV drain inspection adelaide, which will allow you to assess the drain and find the issue without needing to pursue invasive digging.

Document the issue

Although the first thing you might think to do when you notice a plumbing issue is panic, it is good to document the issue. Taking photographs or a video of the issue is good for the plumber. They can look into the issue before arriving and guarantee to bring the right tools. Further, if you are a private tenant, you can send this to your landlord so they can quickly and correctly fix the issue.

Turn off the water

Leaks are a common plumbing problem. The best thing to do when you see a leak is to turn the water off. You should be shown how to do this when you move into the property or by whoever installs your water system.  Turning the water off can stop the flow and prevent the leak from worsening.  

Contain the problem

After shutting off the water, concentrate on minimizing the damage. Utilize absorbent materials such as towels or buckets to absorb any standing water and stop it from leaking into other parts of your house.  If water has penetrated into carpets or floors, take immediate action to dry the area and prevent long-term damage, including the growth of mold or mildew.

Stay calm 

When you notice a plumbing issue in your home, the worst thing to do is panic. When you panic, you can’t think clearly and might delay contacting a professional to help.  When you stay calm and contact someone in good time, they will fix it immediately and prevent the issue from doing more damage. 

DIY fixes

Some plumbing problems have easy do-it-yourself solutions. For instance, consider using a plunger or a drain snake to unclog a clogged drain. Tightening the connections or changing the washer could be the solution for a leaking tap. However, it’s best to speak with an expert if you’re unclear about the problem’s cause or remedy. While online videos might prove helpful, you cannot always guarantee that the issue will be fixed without causing more issues. Hence, when you are unsure, always seek professional assistance. 

Finally, you should never panic when a plumbing issue arises. There isn’t much you can do when you panic. Hence, stay calm and contact a professional if a DIY job isn’t appropriate. It will be easily and quickly resolved when you seek expert help.

Note: This is a collaborative post 
Home & Interiors

How to Maintain and Care for Your Dining Table and Bench Set

Maintaining and caring for your dining table and bench set is essential to ensure its longevity and aesthetic appeal. This guide will provide you with practical tips and advice on how to keep your dining furniture in pristine condition, ensuring it remains a centrepiece in your home for years to come. Additionally, we’ll highlight why purchasing your dining table and bench set from Furniture in Fashion is a smart choice.

Regular Cleaning Routine

Daily Cleaning

To keep your dining table and bench set looking new, it’s important to clean it regularly. Use a soft, damp cloth to wipe down the surfaces after each meal. Avoid using harsh chemicals, as they can damage the finish. Instead, opt for a mild soap solution or a dedicated wood cleaner if your set is wooden.

Weekly Deep Cleaning

Once a week, perform a more thorough cleaning. For wooden tables, use a wood polish to maintain the shine and protect the surface. For glass or metal tables, a suitable glass cleaner or metal polish will help keep them sparkling and free from smudges.

Protecting Your Dining Table and Bench Set

Use Placemats and Tablecloths

Using placemats and tablecloths is a simple yet effective way to protect your dining table from spills, scratches, and heat damage. Choose materials that complement your dining set’s style to enhance its look while providing protection.

Coasters and Trivets

Always use coasters under glasses and trivets under hot dishes to prevent rings and heat marks on your dining table. This practice is especially important for wooden and glass surfaces, which are more susceptible to damage from moisture and heat.

Addressing Spills and Stains

Immediate Action

When spills occur, it’s crucial to act quickly. Blot the spill with a clean cloth rather than wiping, which can spread the liquid. For sticky or stubborn stains, use a slightly damp cloth and a gentle cleaning solution. Avoid abrasive sponges that can scratch the surface.

Special Considerations for Wood

For wooden dining table and bench sets, it’s important to use products specifically designed for wood care. Furniture in Fashion Dining Tables, known for their quality and durability, are treated to resist stains, but regular maintenance with appropriate wood care products will enhance their longevity.

Seasonal Care Tips

Humidity Control

Wooden dining tables and benches can expand and contract with changes in humidity. To prevent warping, keep your dining room’s humidity levels consistent. Using a humidifier or dehumidifier as needed can help maintain the optimal environment for your furniture.

Sunlight Exposure

Prolonged exposure to direct sunlight can cause fading and damage to the finish of your dining table and bench set. Position your furniture away from direct sunlight or use window treatments to filter the sun’s rays. This will help preserve the color and integrity of the materials.

Why Choose Furniture in Fashion?

Quality and Durability

Furniture in Fashion offers an extensive range of dining table and bench sets that are built to last. Their products are crafted from high-quality materials, ensuring durability and longevity. When you invest in a dining set from Furniture in Fashion, you can be confident in its resilience and stylish appeal.

Variety and Style

Furniture in Fashion Dining Tables come in a variety of designs to suit every taste and space. Whether you prefer a modern, farmhouse-inspired, or high-gloss finish, there’s a perfect option for you. Their collections include rectangular, round, square, and bar configurations, catering to different dining room layouts and personal preferences.

Enhancing the Lifespan of Your Dining Set

Regular Inspections

Periodically inspect your dining table and bench set for any signs of wear or damage. Tighten loose screws and address minor repairs promptly to prevent them from becoming bigger issues. Regular maintenance will extend the life of your furniture.

Professional Care

For more extensive care, consider professional cleaning and maintenance services. This is particularly beneficial for high-end materials like marble or intricate woodwork, ensuring your dining set receives the best possible care.

Note: This is a collaborative post 

Home & Interiors

How to Properly Style Your Home with Tall Ceilings

tall ceiling in bedroom

Pic Credit: Pixabay

Needless to say, tall ceilings are a decorator’s dream. Actually, most homeowners would love to have their own features. Actually, this feature within itself is a show-stopper, and for the most part, it’s actually simple decorating if you have tall ceilings. Overall, there’s this sense of awe and wonder when stepping into a space (not just home) that features tall ceilings.

It’s almost like stepping into a grand historical building where every inch of space promises a story. If you really think about it, getting the chance to decorate a home with tall ceilings (as they’re actually not that common) is honestly a great opportunity to stretch your creative legs. Now, by all means, it’s absolutely wonderful, but at the same time, it’s fairly challenging, too,

Actually, the sheer volume of space can feel overwhelming, and the usual decor tricks just don’t hold up. There’s this balance (it’s similar to low ceilings) where it can’t be too airy because it’ll look empty (so nothing too low to the ground), but nothing can be too high either (except for curtains) because it might be too off-putting. So, how can you find this balance? Well, here’s exactly how you can do it!

Let the Walls Speak

So, this should be the thing that you want to take care of first; in most cases, everything can easily come together more easily when you do this. Now, your walls are a part of your tall ceiling, so why waste them? In general, tall walls are perfect for dramatic art pieces or a gallery wall that climbs. 

For example, you might want to think of big canvases, bold patterns, and vibrant colours that draw the eye upward. But it’s not just about art; architectural features like tall wainscoting, plasterwork on the ceiling, or a striking wallpaper pattern can also create vertical lines that make the room seem even grander. Speaking of grand and mirrors!

A tall, ornate mirror isn’t just practical—it can reflect light beautifully, making the room look even more spacious and radiant. Do you know those ones that you sometimes see at fancy estates or even in the Palace of Versailles? Those are a perfect example (granted, they are super expensive), so this could also be something that you take a look into as well.

Allow Your Furniture to Stand Tall

Alright, that heading sounds a bit weird, but bear with it because there’s a lot of truth in that. So, if you take a look at furniture, you’ll find that it’s almost always very low to the ground, sometimes with no space between the ground itself and the actual piece of furniture. 

So, this is where things get really interesting. With tall ceilings, you can—and should—let your furniture rise up a bit. Adding table legs to sofas, cabinets, and tables not only gives them a lift but also brings a sense of balance to the space.

To a degree, it can be nice having furniture low to the ground, but it’s mostly ideal for low ceilings, which is what most homes have. Just think of it this way: low-to-the-ground furniture can look a bit lost in a room where every other element is reaching for the stars. So, just by elevating your furniture, you ensure that it holds its own without being overshadowed by the grand scale of the ceiling.

Consider Layered Lighting

Lighting in rooms with tall ceilings needs to be strategic. You don’t want anything too small or even too boring because it just won’t get any attention. So, you’ll want to start with a stunning central piece, like a chandelier or a cascade of pendant lights, that anchors the room. But don’t stop there! 

Layer in some mid-height lighting like wall sconces or tall floor lamps to create warmth around the living spaces. It would help to have some tall standing lamps, too, for those corners.

Play Around with Textures

You have to keep in mind that high ceilings can sometimes echo back a chill, both literal and metaphorical. Combat this with lush textiles. Not that it sounds a little weird, but there’s some truth to it because over than maybe curtains, nothing is really happening on the walls and ceiling (unless you have palter work). 

So, it might help to have thick rugs, plush throws, and cushy pillows to add warmth and texture to the space. Curtains that run from ceiling to floor not only show off the height but also bring in colour and warmth. You may even want to choose fabrics that echo your personal style, whether they’re bold and graphic or soft and subdued.

There’s also the Furniture Arrangement

With all that space, your furniture arrangement should promote intimacy and comfort. It doesn’t really which room this is either. So, instead of scattering pieces around, group your furniture to create ‘rooms within a room.’ For example, a reading nook by the window or a grouping of sofas around a large coffee table can make even the most cavernous room feel friendly and inviting. Even having a large hutch up against the wall helps in creating some balance too.

Note: This is a collaborative post 
Home & Interiors

How One Simple Change Can Transform Your Decor

Tired of your space’s style? Don’t want to get the decorators in, let alone the builders, to make a fine mess, even if it will mean a much-updated space? Don’t have tons of money to spend on the decor? No problem! Sometimes, making one simple change can truly transform your space…

  1. Say It with Sofas

blue sofa

Pic Credit: Pexels

Your sofa. It’s more than just a seating arrangement; it’s the anchor of your space. Swapping your old sofa for something bold and beautiful, which is really easy with so many sofas for sale, can redefine your living area. Opt for something that pops—think velvet for a touch of luxe, or a bright, unexpected colour like mustard yellow to inject some cheer. A new sofa isn’t just a place to sit; it’s a statement piece that can dictate the tone and feel of the entire room.

  1. Art on the Walls

Swap out those old movie posters for some striking pieces of art. You don’t need a Monet or a Van Gogh; just something that captures your personality. Whether it’s vibrant street art prints, abstract canvases, or vintage finds, art can transform a wall, a room, or even an entire apartment. It’s like the visual equivalent of a mic drop.

  1. Throw in Some Textiles

Sometimes, all you need are a few plush cushions and a throw to make everything feel new. Mix and match different textures and patterns to add depth to your decor. A Moroccan throw or some hand-woven cushions can add a dash of exoticism and comfort to any room. It’s an instant facelift, minus the surgery!

  1. Refresh Your Shelves

Take a hard look at your shelves. Are they cluttered? Are they a mishmash of everything and anything? Time to declutter and curate. Choose a colour scheme or theme, and display items that reflect that, be it books, vases, or your collection of vintage cameras. Styling your shelves can change the aesthetic of your room and showcase your personality.

  1. Change Your Handles and Knobs

Here’s a simple trick with knobs on—change your handles and knobs. It’s like jewellery for your furniture, and often all that’s needed to give cabinets or drawers a new lease of life. Go classic with brass for sophistication, or funky with ceramic for a splash of fun.

  1. Add Architectural Details

Installing crown moulding, chair rails, or wainscoting can add elegance and architectural interest to your living room. These elements can break up a monotonous wall, add historic charm, or simply provide a finished look to your space.

  1. Update Your Doorways

Doorways are often neglected because, as long as they look clean and tidy, who cares about them really? They’re just for walking through or closing out the draught, right? Well, no! Adding decorative frames or moulding around your doors can definitely make the place look more elegant, and of course, painting the frames a different colour to the rest of the doors can really make the space pop.

You really don’t have to take on a lengthy renovation project to transform your space!

Note: This is a collaborative post 

Home & Interiors

Signs Your Pipes Need Some Attention

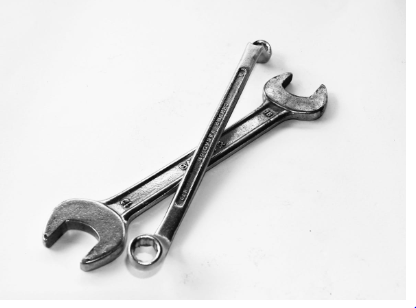
spanner

Pic Credit: Pixabay

There are certain specific signs that your pipes need attention and you shouldn’t ignore. These are red flags and when those flags start flying, you should not ignore them for long periods of time. Doing so would be detrimental to your overall plumbing system. Here is what you need to know about the warning signs.

Slow Drains

The most common sign that you have plumbing issues and need pipe repair is when you have slow drains. If your sink, showers, and your bathtubs are all draining slowly it means that there are clogs somewhere in the plumbing system. Often this is caused by a buildup of grease, hair or even soap scum. 

Discolored Water

If you’re noticing discolored water coming from your tap then this is something you should never put up with. This water may be discolored for a number of reasons. 

It may be that the pipes are rusty or that the water from the source has been contaminated. Whatever it is you certainly can’t fill up a glass with that and swallow it. It’s going to be a severe issue. 

When this happens your plumbing system is screaming for attention. At this point, the best thing you can do is call a professional.

Water Stains and Dampness

If you’re having a water stain and dampness issue then this is also another sign that you may have leaking pipes. The stains will show up as discolored patches on your ceiling and on your walls. This can lead to large areas of mold growth which can be detrimental if you inhale it.  Dampness or puddles around your home especially when it starts happening in those areas where you have plumbing present usually means that there is water damage. These will cause a tearing down bit by bit of the structure of your home. It needs to be nipped in the bud immediately.

Low Water Pressure

Low water pressure is one of the symptoms that there is something causing your pipes to malfunction. It’s not necessarily a serious problem but it can be very inconvenient depending on how low it gets based on the activity you are doing.  If the pressure is so low you have to be showering for half an hour instead of 10 minutes and then you have a problem. It can slow you down and put you in snail mode. 

When you’re washing dishes this can be a lesson in frustration as well. It’s always a good idea to get someone who understands how a plumbing system should work to take a look at it for you.

Unpleasant Odors

If you have to be wrinkling up your nose because you’re smelling foul odors then it is an indicator that something is not quite right in your plumbing as well. It could be that the sewer line has been affected and this is where gas can emit some very foul odors. 

This can cause you to sway on your feet and become nauseous, it’s a situation that needs to be checked as soon as possible. 

Note: This is a collaborative post

Home & Interiors

Warning! Think Twice Before Using Your Loft As Storage Space

Let’s be real for a second, we’re all partial hoarders. Some of us may claim we aren’t, but the amount of junk we keep in our homes says otherwise. Okay, “junk” is a harsh word – many of the things you hold onto are sentimental or could be valuable at some point. You pack them away in boxes (like your child’s old baby clothes) and store them somewhere out of harm’s way; a place you don’t have to think about, so your home doesn’t become too cluttered. 

Nine times out of ten, that place will be the loft. You’ve got so much stuff up there from generations of family life, but it’s okay because it’s out of the way and nobody sees it. With that being said, what if you were told to think twice before using your loft as storage space? It turns out this part of your home might not be the perfect place to keep your belongings – and you’ll soon see why. 

Extreme heat can damage your items

Have you ever entered your loft in the height of summer? Even when it’s 20 or so degrees outside, your loft feels the heat inside. This is because most homes are designed with basic loft insulation to trap heat in. When the sun beats down on your roof, it keeps as much of the heat in as possible, heating your loft to maybe even 30 degrees or more. 

This is awful for everything inside – extreme heat can damage electrical items or cause valuable things to degrade. It’s even worse if you have uncovered windows on your roof; the sun fades any items and can ruin them forever. Solve this by making your loft more thermally efficient. Use roof insulation batts that reflect solar heat in the summer, maintaining a cool temperature in the room. Cover the windows with shades too, so sun damage doesn’t occur either. 

Tiny leaks in the roof may lead to water damage

a full loft storage area

Pic Credit: Unsplash

More damage can happen during wet weather – and this is a direct result of roof breaches. The smallest crack or gap can lead to water leaks that cause serious water damage to all the items stored in your loft.

Water damage is arguably the worst form of damage possible. It will utterly ruin storage boxes and their contents before turning into mould. This causes an even bigger issue in your loft, so you must carry out roof inspections to prevent leaks from appearing. Well, you won’t carry out any inspections; get the professionals to do it for you. Identify and plug any problems to keep the loft dry. 

Lofts are the perfect place for pests to wreak havoc

Speaking of breaches, there could be some in the walls or around the gutters, making it easy for pests to get into your attic. Rodents or birds are the most common concerns and they’ll make nests inside. This leads to your belongings being covered by pest poop and pee, as well as possibly being eaten or torn to pieces. 

Roof inspections will help identify any breaches again, or you can call pest control services to survey your loft and provide preventative measures to keep pests away. As a result, your loft – and its contents – will be safe from harm’s way. 

Think twice before using your loft as storage space because it might not be equipped to do so. Keep your items in the loft if you’re 100% sure they won’t be damaged in any way by the elements or pests! 

Note: This is a collaborative post 

Home & Interiors

No More Excuses: DIY Projects That Fit Your Schedule and Budget!

No More Excuses: DIY Projects That Fit Your Schedule and Budget!

We’re all guilty of putting off DIY jobs around the house and garden, citing financial or time constraints. But many jobs can be done in hours or days at most and don’t have to cost a fortune. 

Update a Downstairs Loo

A downstairs loo is quite literally a convenience and often gets ignored when it comes to decorating or updating. But as it’s a small room there’s no reason why you can’t tackle this upgrade over a weekend. 

Whether you just paint or wallpaper the walls and change the toilet seat or install a new toilet and sink there are plenty of online tutorial videos that will take you through the process, step by step. For really small loos there are even toilets with a sink above the cistern so even the tiniest room in the house can get a makeover.

Put in a Porch 

If you’ve been considering installing a porch for years and keep putting it off, now is the time to do it. For those with DIY building skills, this job can be done in a week or two depending on the size and materials it’s made from. 

Size and material will also affect the building a porch cost which can range from about £1,500 to around £4,000. However, it can add saleability to your property and creates extra usable space around the front door. Remember to check whether you need planning permission before starting work. 

Hang Wallpaper

One of the most common DIY tasks that strikes fear into the hearts of homeowners is hanging wallpaper. This is why this project gets put off, sometimes for years. While it may look complicated, practice will give you confidence so start small. Choose the tiniest room in the house and paper that has no repeat patterns so there’s nothing to line up. 

For added simplicity, paste the wall wallpapers are far less involved and you don’t need a pasting table. There are a multitude of online videos you can watch to gain tips and advice to successfully complete this project. When you see the results, you’ll be glad you did. 

Re-roof the Shed

The shed is the workhorse of your garden, storing tools, protecting bikes and garden furniture and serving as a general dumping ground. Neglected it can quickly fall into disrepair leaving it and your belongings at the mercy of the elements. If your shed roof needs repair it’s something you should tackle sooner rather than later and it doesn’t take long. tools

Felt roofs can be quickly removed and replaced by taking off any fascia boards and finials, untacking the damaged felt and replacing it with new felt cut to size. The fascia and finials can then be replaced. Your roof has a new layer of protection and the contents of your shed are properly sheltered. 

Paint Your Fence 

Painting your fence is not the most exciting DIY task you’ll embark on but it is necessary and will prolong the life of your fencing. These days you’re not constrained by just brown shades and can choose from a variety of bright and cheerful fence colours. 

While painting should only take a day or two depending on the size of your fence, don’t forget the importance of proper preparation. This includes cleaning, repairing any damage and sanding down the surface before applying the paint. Once that’s done you can have fun brightening up your garden with a fresh new fence colour. Job done!

Note: This is a collaborative post